Creating Triggers in Leadboxes
Triggers are rules that can be created within the lead box editor to define specific conditions which must be met in order for the lead box to appear on the website. In other words, triggers allow you to make lead boxes appear on specific pages of the website.
You can create or modify triggers for your lead box by following the steps shown below:
1) Log in to PatientSites Web Editor at client.patientsites.com

2) From the Lead Capture section in the Main Navigation Bar, click on the Leadboxes submenu item.

3) Click on the pencil and paper icon, labeled as Manage Leadbox, on the right side of your chosen leadbox's row, under the Actions column.

3) Click on Trigger settings in the left sidebar and choose what triggers the Leadbox to appear.
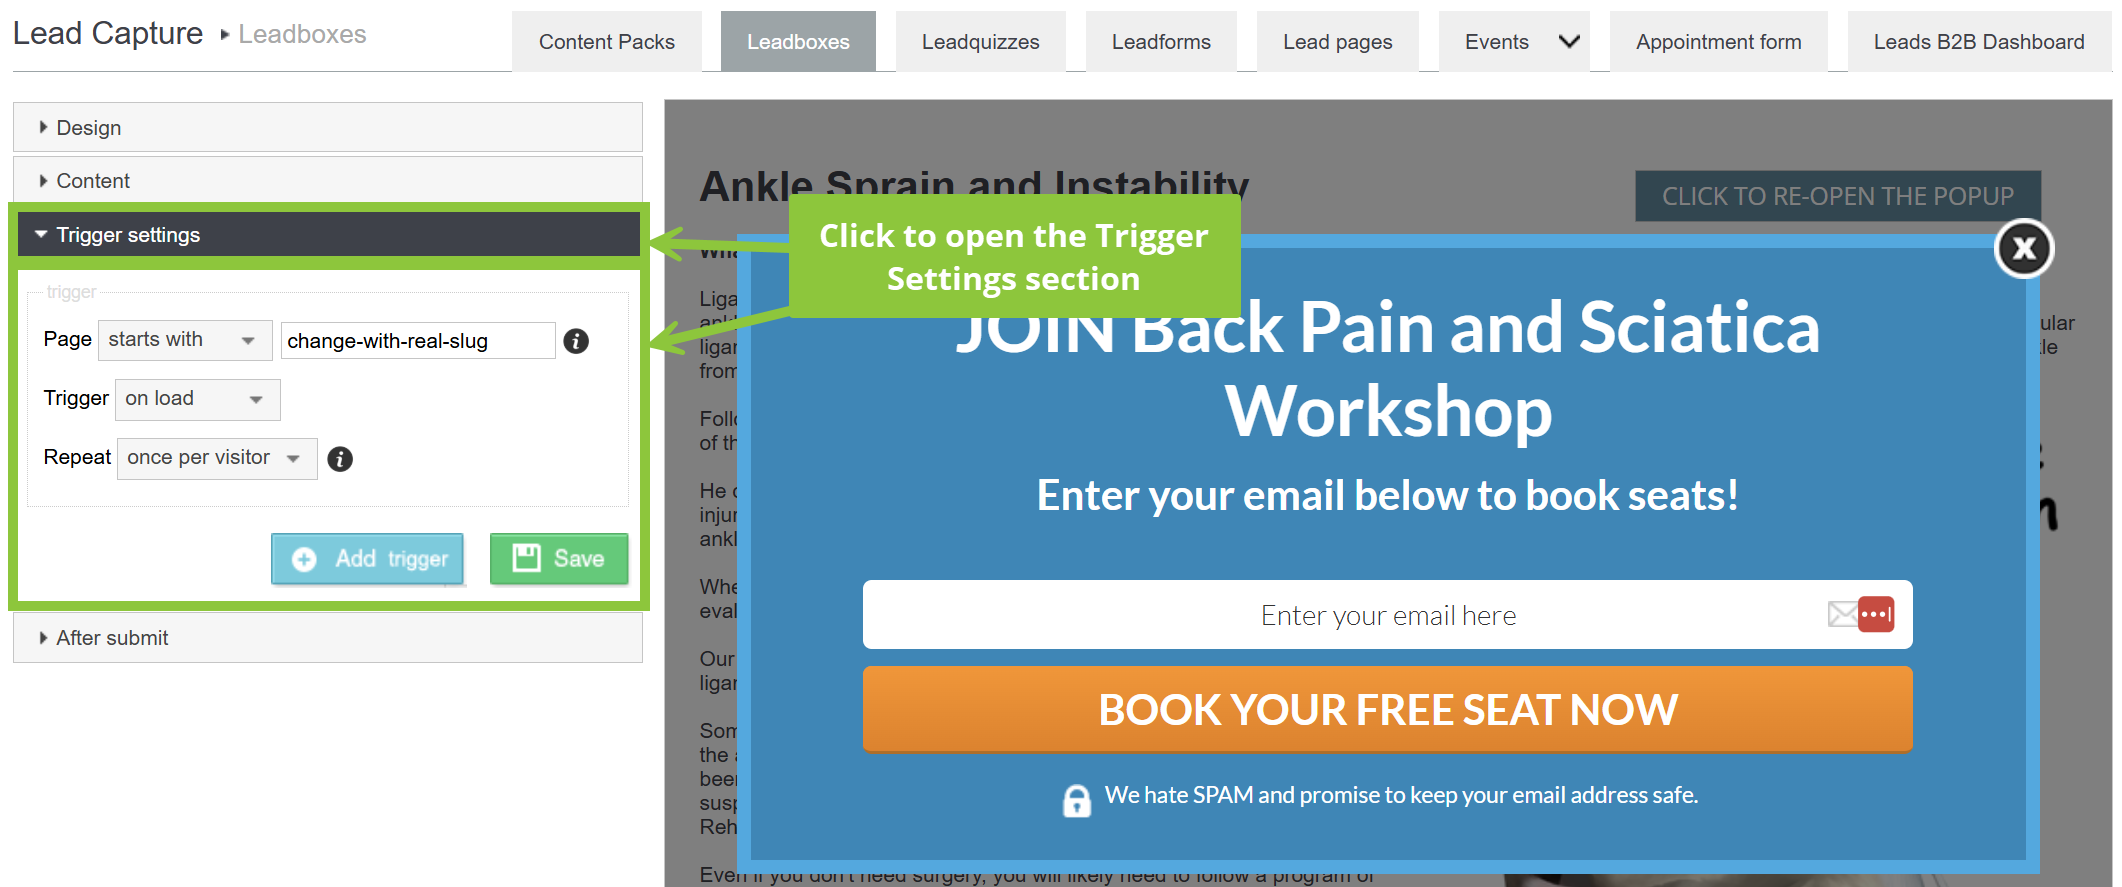
4) You will be able to use following three options to create a unique trigger for this lead box
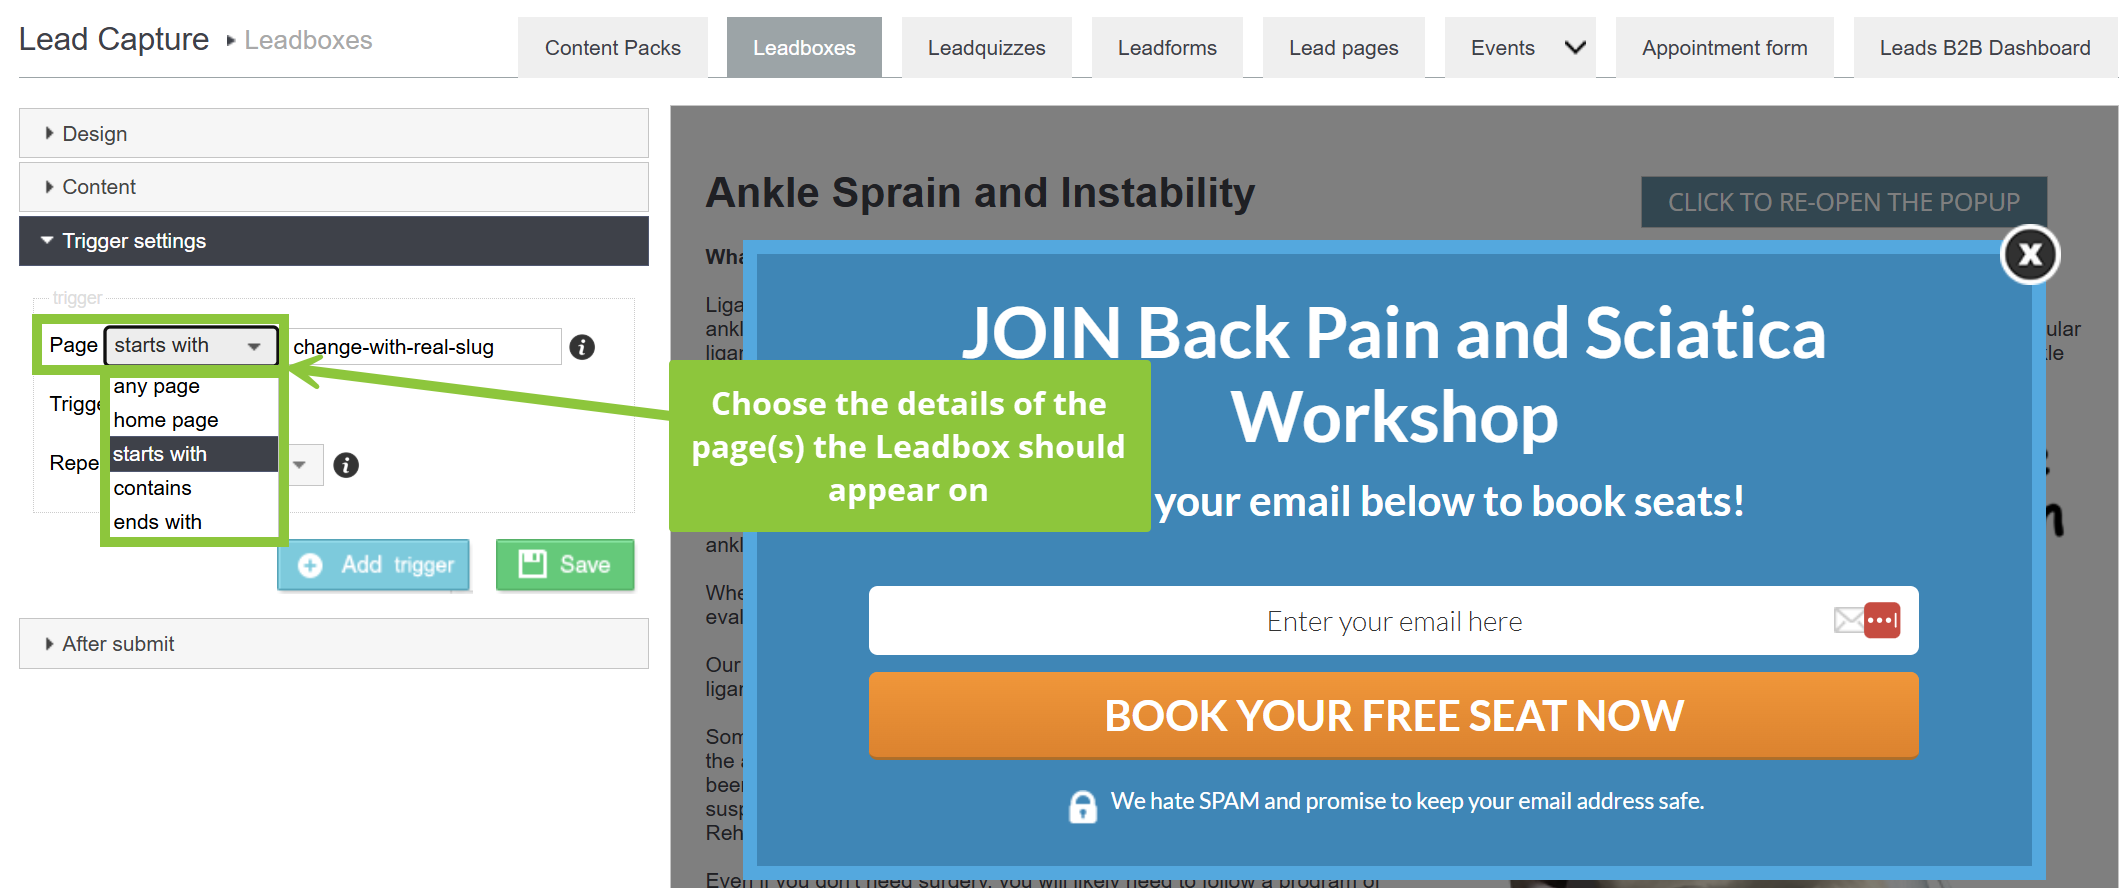
- Page: This option allows you to define the page(s) where the lead box should appear. You can use different variables to create rules for where the lead box appears, such as:
- Any page (shows on all pages of the website)
- Home page (shows only on home page of the website)
- Starts with (allows you to target pages starting with a specific URL)
- Contains (allows you to target pages containing a specific URL)
- Ends with (allows you to target pages ending with a specific URL)
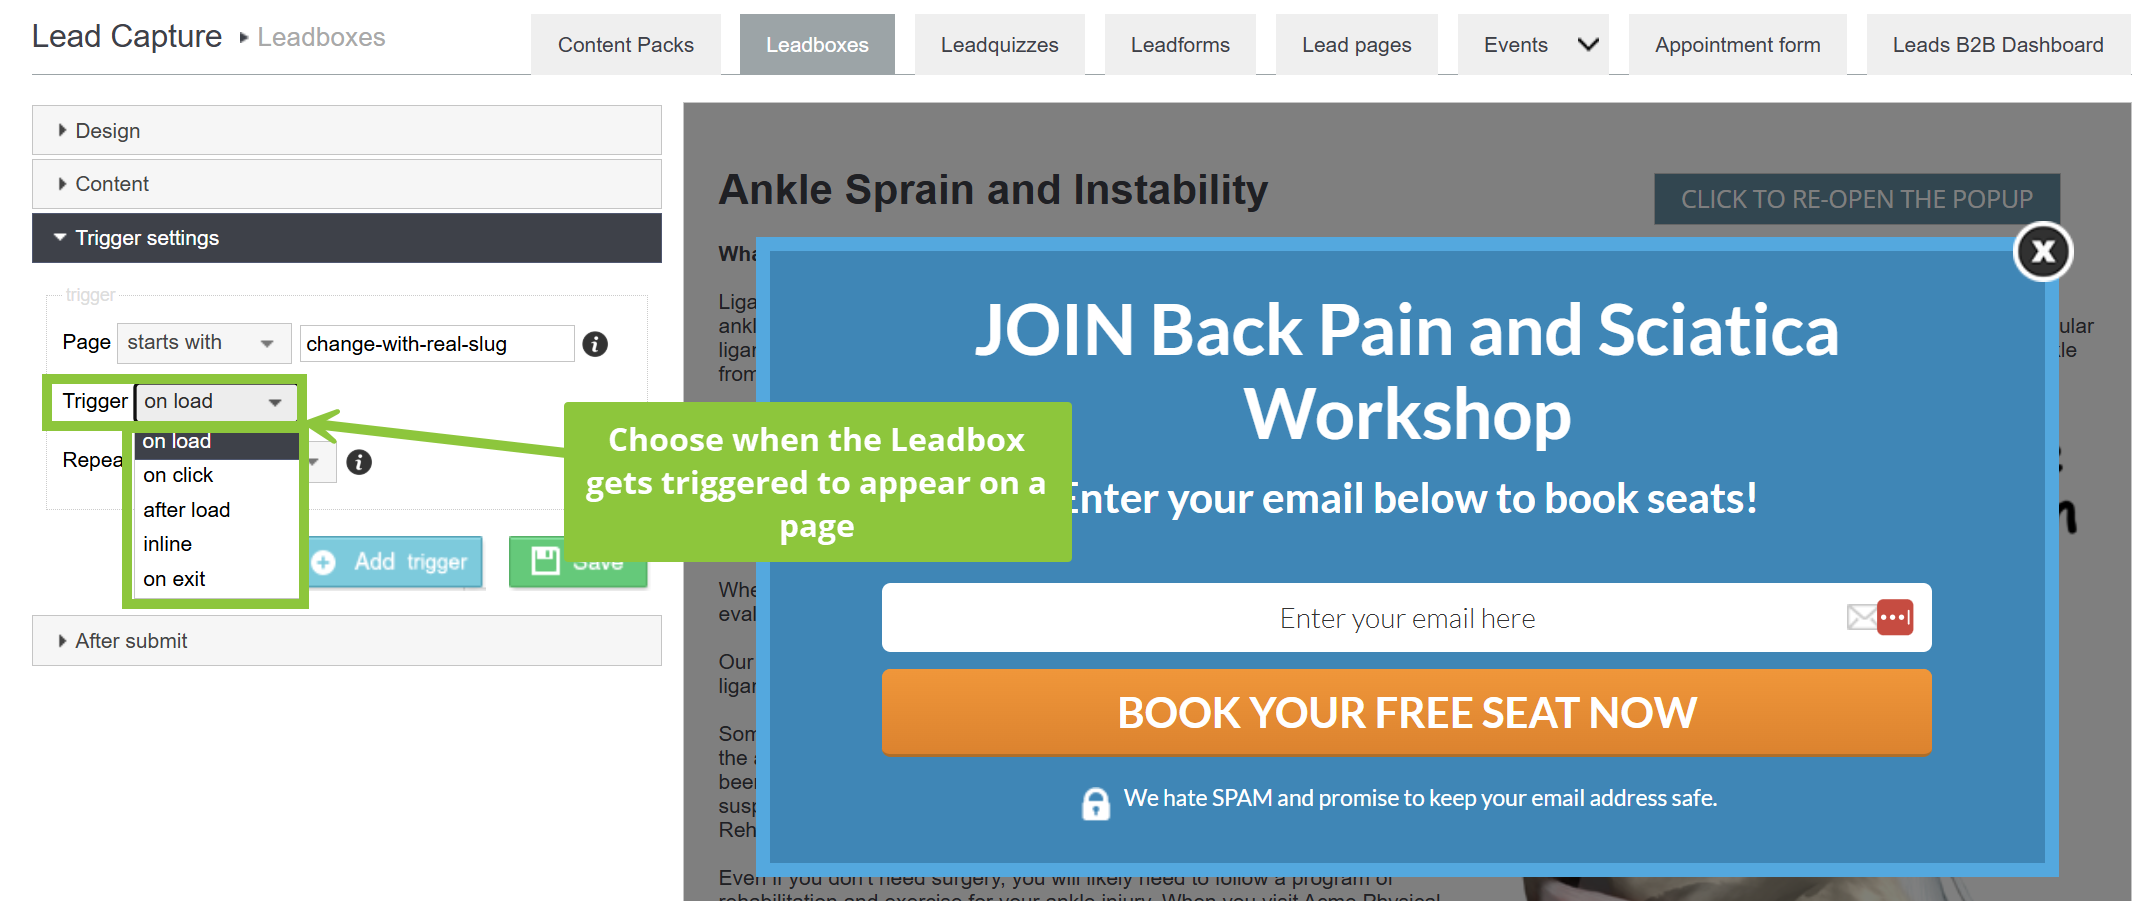
- Trigger: This option allows you to define when the lead box appears on the page(s). You can select between the following preset triggers:
- On load (shows the lead box once the page has finished loading completely)
- On click (shows the lead box when someone clicks on a button)
- After load (allows you to set a time delay after the page has finished loading)
- Inline (allows you to add the lead box as a static form on the website)
- On exit (shows the lead box before someone is about to exit the website)
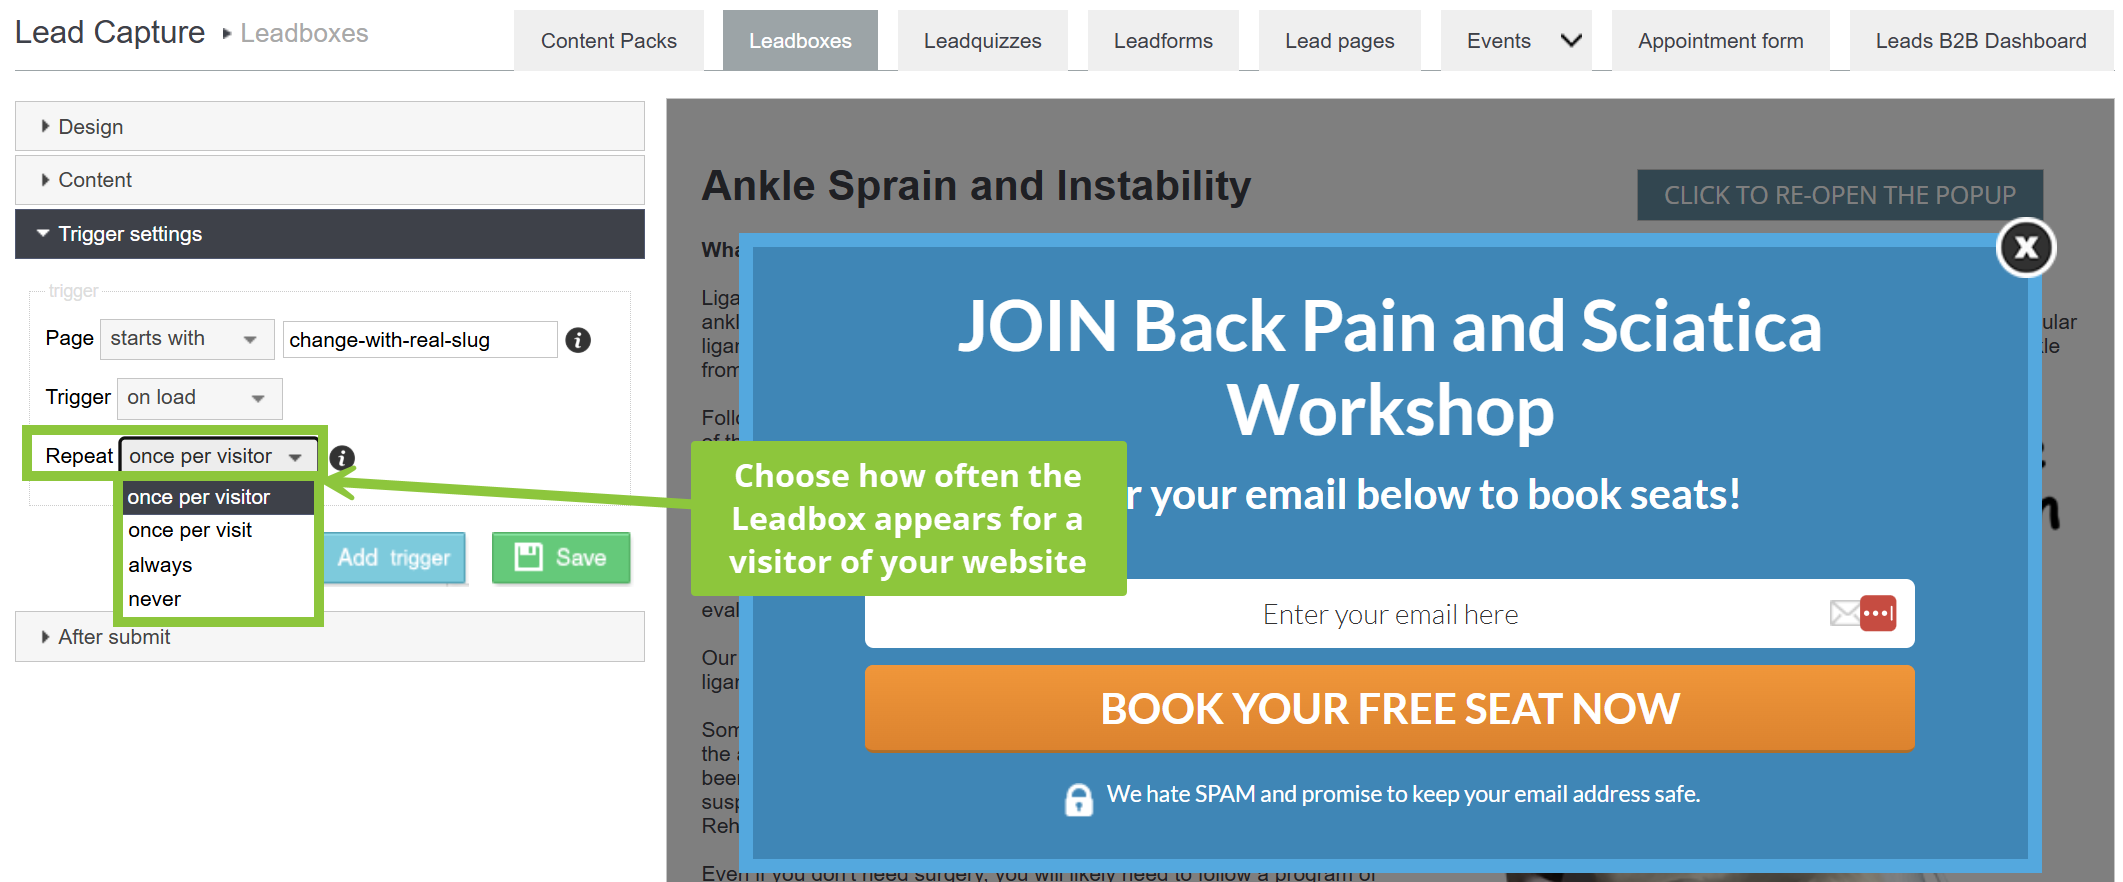
- Repeat: This option allows you to define how often the lead box appears on the page(s). You can select between the following preset repeat settings:
- Once per visitor (shows the lead box only once per visitor)
- Once per visit (shows the lead box once for every visit to the website)
- Always (shows the lead box at all times and should only be used for testing)
5) You can create as many triggers as you would like by clicking the Add Trigger button. Then, repeat the process of setting up the trigger details.
6) Once you're done, click the green Save button to save your changes to the Leadbox.
Please reach out to us at support@patientsites.com if you have any questions about setting up a new trigger for your website.